Finished the Polymer clay Martial Arts Sculpture now on to the next


With much trial and error I have finally finished this sculpture. I learned so much in doing this one and made a ton of mistakes. I’m hoping that I remember those goof ups next time.


I plan on trying to recreate my Grand-Daughter next and I’m sure that will be full of special challenges too but I’ll give it a go and see what happens. I hope you’ll follow me along the way and maybe learn something too. I’m going to post step by step pics of the process so you can see how I do it from the very beginning. I have ordered some supplies and as soon as they arrive I’ll be starting the new sculpture. Should be around Wednesday or Thursday I think.

A good friend on mine (Harry Wood of Oscar crow) has offered to send me an anatomy book which will help a great deal in getting things right and in proportion. He’s so helpful and knowledgeable. Check out his blog for tons of tutorials.  http://www.oscarcrow.blogspot.com/   I highly recommend it!

This is the photo I plan on basing the next creation from but as you all know that can change when flubs appear..LOL  Isn’t she adorable! This is actually an old photo of her but it’s one of my favorites.

Something is watching me as I weed the flowerbed


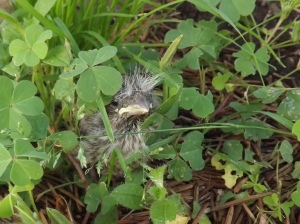
What a beautiful day it is here in Southern Oregon on the 4th of July! It’s a good day for weeding the ole garden,at least that’s what I told myself this morning. Since my recent surgery I haven’t been able to get out and get the weeds under control and they have just gone crazy. Out the door I go with my gloves and a garden shovel to tackle this mountain of a task but the whole time I feel like I’m being watched for some reason. I shrug off that feeling and keep on pulling the blasted weeds when suddenly I see what has been watching me. This little bird was hiding amongst the weeds just as still as it could be watching my every move and hoping I wouldn’t see it. such a cute little bird. I stopped long enough to get a picture of it and then went back to my chores. A few minutes later I see another baby bird a few feet away from the first one. Needless to say I finished what I could but left the weeds where these little babies were hiding for another day when they have flown away.

Trial and Error in Sculpting


Well crap! What a frustrating day it’s been. I’ve had to redesign this sculpture a bit and adapt to some mistakes I’ve made. I had intended to have this guy balancing on one leg but I forgot to reinforce the spine to hold the weight. So, I’ll have him kneeling instead. Note to self, always reinforce the spine down the entire leg for this application.

I did make some pretty good progress on the upper body though and can still salvage this sculpture. Sorry for the bad photos but like I said, it’s been one of those days for me today. Hopefully tomorrow will be a better day.

Polymer clay Martial Arts sculpture


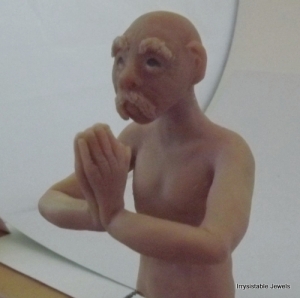
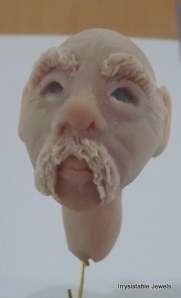
Here I go again, challenging myself to do something new and difficult. I’ve decided to try to sculpt a Martial Arts sculpture. It actually didn’t start out that way but since the head was determined to become a male I had to change my plan. I’m so glad I did now but at the time it was really frustrating. So far, I’ve gotten the head sculpted and cured on the armature and the hands are sculpted.

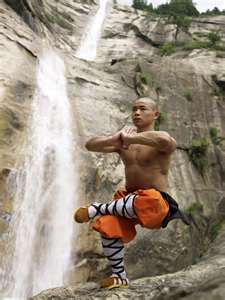
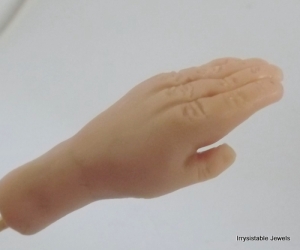
I had a lot of trouble getting the hands correct but all in all I’m pretty happy with them. I might try to do a little more detail work on them tomorrow though. Here’s a photo of the pose I plan to use but keep in mind it will be a bit different, hopefully in a good way.


Here’s the head I came up with after much pushing and pulling, adding clay and taking it away. I’ve only taken a picture of the left hand but I did get the right one completed today too. I’ve also finished the armature and added a bit of the skeleton to it. I’ll get some shots of that in the morning, time for me to get a good nights sleep so I can work on this again tomorrow without yawning the whole time.

Life Size Polymer Clay Flowers


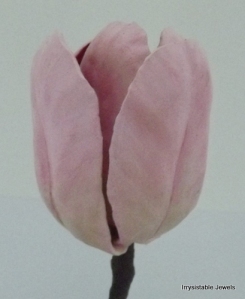
Over the past week I’ve been challenging myself to handcraft a life-like floral arrangement out of polymer clay. It’s had its ups and downs so far but I’m making progress. This will be the most difficult piece I’ve attempted so far. I have always had a love of flowers so I figured why not see if I can do this. I must say the greenery is a hard thing to recreate too but the Tulip is by far the hardest yet. You can follow my progress on facebook too as I post there as soon as I complete a flower. Here are a few I’ve finished so far. Leave me a comment and let me know what you think. I’d love to get your opinion and suggestions.

Polymer clay Polar Bear


I’ve been working on this Polar Bear the last couple of days since the weather is so wet and cold outside here in Oregon. It seemed like the perfect subject to go along with the wintery mix. Although it’s not completed, I wanted to share my progress with you.

Polymer Clay Salmon Sculpture


Well here it is, the finished sculpture. The only thing left to do is seal it and send it off to my Dad  for father’s Day. I had fun with this one.Image Now to figure out what to create next, hmmm. I do have a necklace to work on for the AMY Roloff Charity Foundation but it’s still in the design stage at the moment. A trip to the Zoo would be fun and inspiring but we don’t have one close enough for me to go. Sure wish we did though. There’s nothing more fun than spending the day at the zoo checking out the wildlife.


Father’s Day Sculpture


I’m working on a Father’s Day sculpture right now and wanted to share it with you. I’ve completed the Salmon and now will be working on the stand to hold it. I’m pretty happy with how the fish came out and have my fingers crossed that the rest of it will be what I have planned. ImageYou never know when you’ll have a happy accident though and everything changes. I suppose that’s what I love about working with clay. You just never know how your creation will turn out until it’s finished. I’ll post the completed sculpture soon as I plan on working on it again today.

PCAGOE March Challenge is up and ready for voting


I have been really as of late and my poor blog got put on the back-burner. Sorry about that. Since I last posted I have been accepted into the Polymer Clay Artists Guild of Etsy and couldn’t be happier. I’ll be posting some Guild things here for you to see what I’m up to. I’ve also been trying to perfect my tutorial making skills. There’s a March challenge going on at the moment and it would be great if you could check it out and cast your vote for your favorite. Some really nice pieces by very talented people and worth the time to look and vote for sure. http://polymerclayartists.blogspot.com/2012/02/march-challenge-bold-graphics.html

The PCAGOE is a wonderful group of talented people and I feel honored and fortunate to be included in this group. I’m sure I’ll be learning tons of new things as I interact with everyone there.

Have you checked out the new issue of The Polymer Arts magazine yet? I did, and I must say it’s a fantastic read and full of wonderful information and stunning pictures! It’s a must read for the serious Polymer clay artist in my opinion and it will only get better over time.  I love the cover photo!  

Here’s a link to the sample flipbook so you can see for yourself how wonderful it is.  http://thepolymerarts.com/SampleIssues.html

 Here’s a couple of pictures of what I’ve been working on since I last posted. I’m learning more and more about sculpting with polymer clay and am eager to start sharing what I’ve learned with you. This week I will be posting another tutorial. I’m working the kinks out now but in the meantime, be sure to check out the links above and enjoy. Happy Claying, Tamara/Irrysistable Jewels


Polymer Clay Seahorse


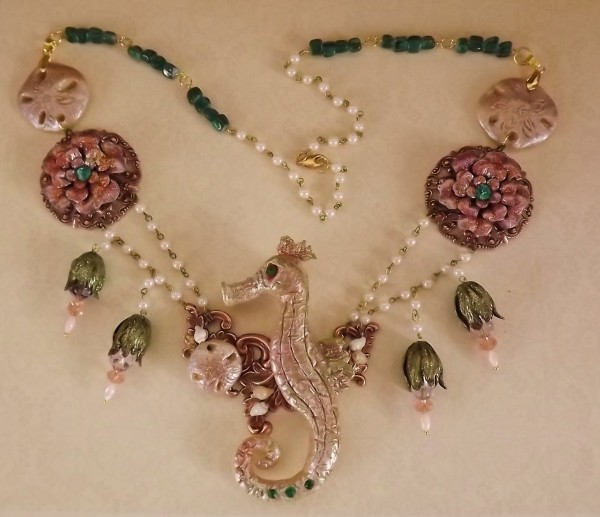
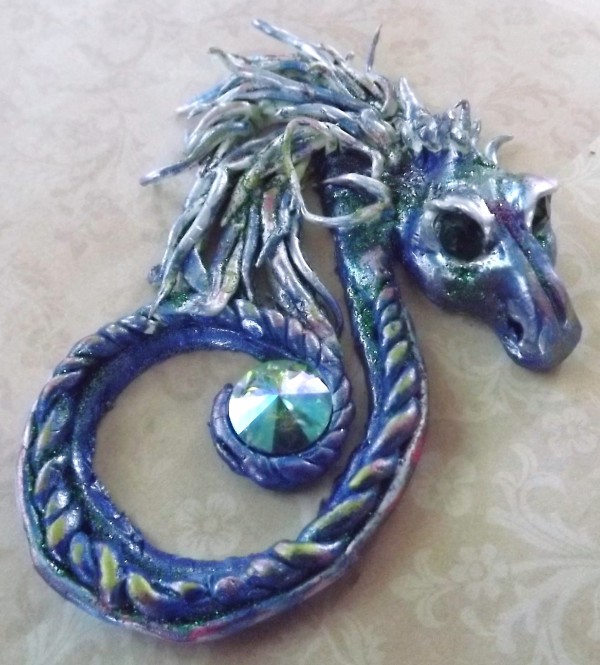
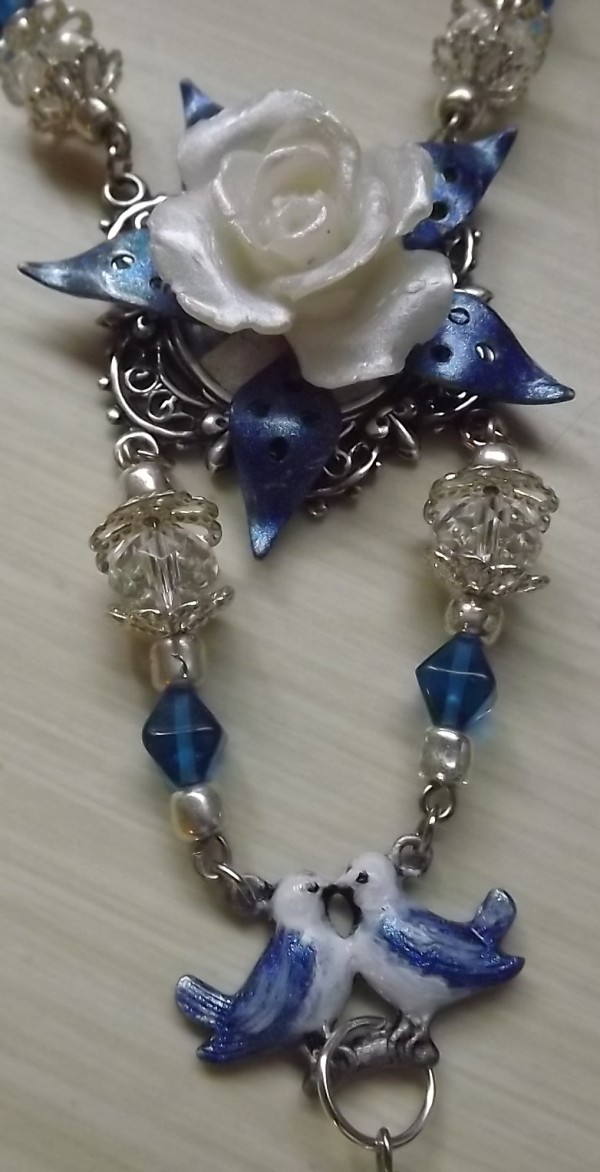
I can finally reveal the Necklace I made using those little sand dollars I showed you how to make. This Sea Horse was really fun to make and I’m pretty happy with the result. I’ve been going through some medical issues and it’s kept me from my blog a little longer than expected but I’m back now and will be adding some new content in the next day or so. Find all my new creations at my Etsy shop and on my Facebook page.   

Polymer clay is so fun


I’ve finally finished my newest creation and this one was quite a challenge. I love how it turned out though. Flowers have always been a love of mine so it’s a natural marriage with clay. I’ll be writing an essay today to submit to a flowers contest  along with a photo of an Orchid polymer clay necklace. I have no idea when I’ll hear from them in regards to this contest but I’m super excited. I only wish I could share the picture with you. Maybe you’ll be seeing it in Polymer cafe soon.  Check out my Facebook page  for updates on the contest and other submissions I’ve been working on.


I need to spend some time on my website this afternoon and get it all updated.  I’ve been so busy creating I haven’t paid much attention to it. I’ve also got some ideas for a couple of tutorials I need to get started on. I’m trying to get a handle on the video aspect for those so stay tuned for that. Have a wonderful day and thanks for stopping in to see my blog.

Polymer Clay Flowers/Star Gazer Lily


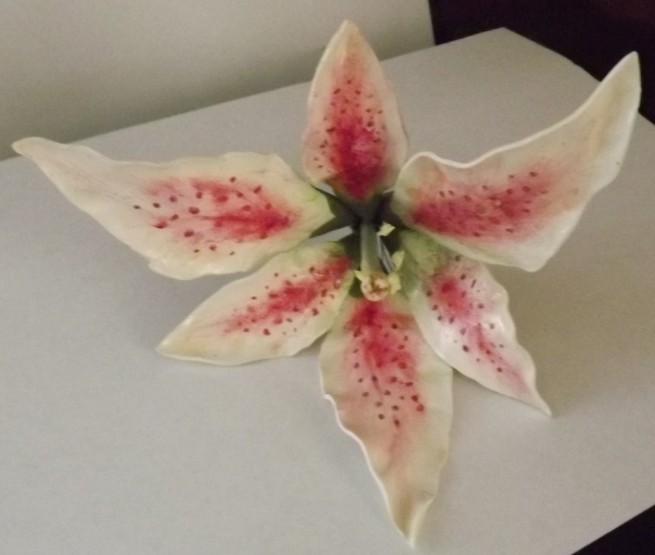
I’ve been very busy creating some polymer clay flowers the last few days. Taking my cake decorating skills and transposing them into clay has been an experiment to say the least but it does work with a little tweaking. I made this Star Gazer lily a couple days ago and applied some watercolor paint to it. I love the soft effect I achieved.  Today I made a smaller version and painted it with powders so I could compare the two and decide which one worked best for florals. I must say I think I like the watercolor effect best but they both look good. Currently I am working on another necklace for a magazine submission using the Star Gazer as the focal.

 I’m thinking about posting a tutorial on this Lily in the near future so if you’re interested in that  please leave me a comment at the end of this blog.

My Granddaughter’s birthday is approaching soon, so rather than buying her something, I created a special little sculpture for her. Sure had fun with this one and I’m sure she’ll love it.  I can see some Christmas Ornaments coming at some point. Those should be really fun to create. Little kids love to see their names on things and my Grandkids are no different. I love making things for them!

Here’s another floral necklace I created a few days ago. I would do this one a little different next time though. I should’ve surrounded the petals with some baking soda to keep them from drooping. Live and learn I suppose.  I’ll be listing this one in my Etsy shop in a day or so. Still have a few things to finish on it first.

I love working with polymer clay! It’s the best stress reliever around if you ask me.


How to Create a Polymer Clay Sea Dragon


Ok, so last week I showed you how to make a polymer clay sand dollar. Would you like to learn something to go with it now?  I had intended on showing you how I used the Sand Dollar but I have submitted that necklace to a magazine for inclusion and am unable to reveal it until I get a yes or no from them. Keep your fingers crossed for me. I will get something published before the year is over, that’s my New Year’s resolution.  I’ve been very sick the last ten days so I haven’t felt up to creating or working on my website or Etsy shop. finally feeling better and ready to show you something else to try.

OK, back  to the lesson now, I have designed a Sea Dragon for you today. I made a beautiful Seahorse to share but that one is on the necklace mentioned above. I promise I’ll share it when I can but until then we can make this little guy. There’s no right or wrong way to do this so put your fear aside and just have fun with it.

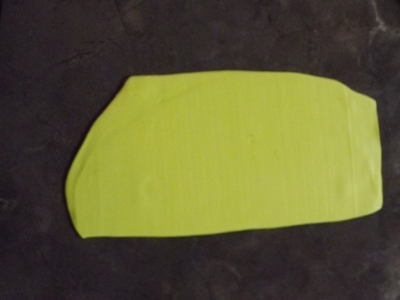
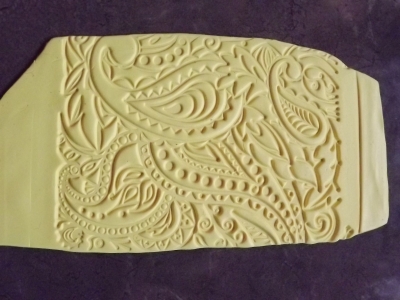
First you’ll need some conditioned clay. Here I am using a bright yellow (shows up well for the camera) but you can choose any color you’d like.  I then flattened it with my pasta machine on the highest setting but a rolling-pin works too, just takes a bit longer. I bought this great texture mat from a wonderful little shop called BSueBoutiques and figured this was a great time to use it. Anything that will give you some texture will work though. Lace, brass stampings,just about anything will do. Look around your house and you’ll be surprised what you can find that will make a pattern in your clay.  

     There are a few handy tools I use, but mostly I use my hands. A razor blade is something you will need to cut out the shape or a very sharp knife. I started out with a toothpick and a pocket knife for tools so use whatever you can find and remember there are no right or wrongs here.  

Now let’s cut out the basic shape of our little  Sea Dragon. Yours does not have to be exactly like mine, in fact, it’s better if it isn’t since this is your Creation and it should reflect you. Just play around with the clay until you find a shape that works for you. That’s the best part of working with clay, you can just ball it up and start over if you don’t like it. Here’s the shape I ended up with. Feel free to print this out and use it as a template if you’d like. Lightly roll the edges with your fingertip to smooth out the blunt cut a bit. Now comes the fun part, Let’s decorate this little beast. I formed a mane using small balls of clay rolled into a cylinder shape and pressed onto the head. Make your Sea Dragon with as big or small a mane as you please, or maybe not at all if that’s what you like. 
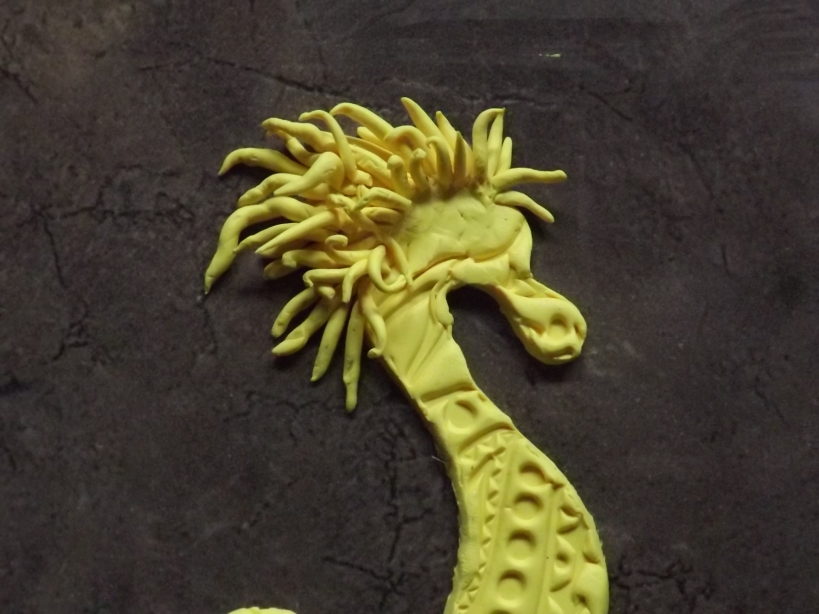
Try not to make these too thin at the tips or they will not be strong enough after baking. I start out with a long pretty thick layer of tendrils on the bottom and keep adding tendrils varying in size from large, medium and finally small in the direction of the face. This adds lots of dimension and a little drama to the creature. When you are satisfied with the way the mane looks why not go for a little on its tail as well like I did here.

I like the way he’s taking shape now. Now comes the really fun part. Let’s embellish him with pearls, crystals, beads or whatever you’d like (but remember he needs to be baked so keep that in mind when you add things). Here I’ve added some pearls and a few small crystals. When adding beads and such that will be baked into your creation you’ll need to adhere them with a little extra clay. I simply wound a couple of pieces of clay like the tendrils we made around the bead and then smoothed it down with my fingertip a little. You could also just make an impression with the stone or bead and glue it in after it’s baked if you so choose.


I plan on adding some chain or beads when I’m finished so I created three holes for that in the tail. Better to add your holes before baking I think. You can see I used some tendrils on the body in a curly fashion but I didn’t like the look and have removed them from mine. Needs a little more bling don’t ya think?

Now that’s better! I also did a little fixing on the face too. I used a red crystal for the eye and built the area up with a small amount of clay. Just make some very small tendrils and adhere them above the crystal or bead and smooth it down a little. I did the same for the nostril too only a smaller crystal was inserted. I hand formed a small fin and attached that into the middle of the back toward the edge. I think mine is done.  How bout you?

 I always paint mine before putting it in the oven but you can certainly wait and paint it after baking if you’d prefer.

I think I’d like my Sea Dragon to have some splashes of orange and red on him. Choose whatever colors you think would enhance your Sea Dragon and give him a little sparkle. I love adding fine glitter to my creations too! This yellow was just a little too bright for my liking so I went over the body and face with a touch of Viva pearl precious metal colour. I then added some orange and a little red acrylic  paint to the mane before putting him in the oven on 275 degrees for about 35 minutes. Here’s my finished Sea dragon.
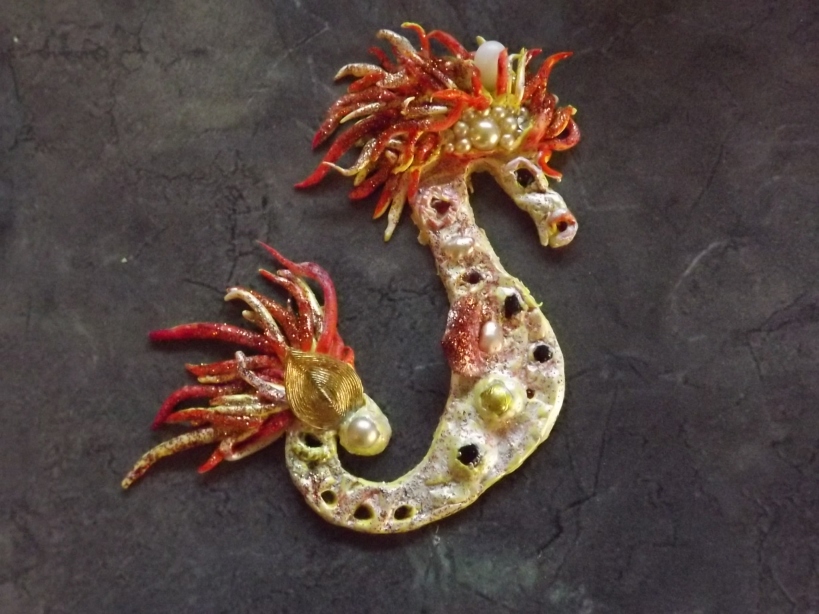
Would you like to see more lessons? Leave me a comment and an idea about what you’d like to create and I’ll do my best. We can learn together. Sounds like fun to me. Can’t wait to see what ideas you suggest. 🙂

How to make a polymer clay Sand Dollar


Hello and welcome to my little studio here at Irrysistable Jewels 🙂

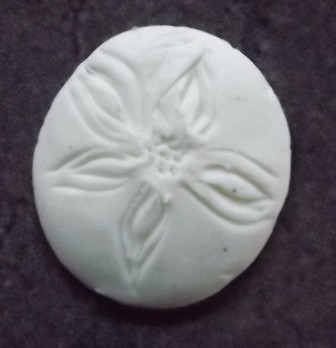
I’m working on a new polymer clay necklace to add to my Etsy store and thought I’d take a breather and teach you how to make a Sand Dollar out of clay. It’s easy and anyone can do it! Nothing in nature is identical so only happy accidents can happen, therefore you can do this one without fear.

First you’ll need some polymer clay. I personally use sculpey but any clay would work. I’ll be exploring the different kinds of polymer in the near future. Make sure your clay is well conditioned and ready by working it in the palms of your hands until it is soft and malleable.

As far as tools go, you can use whatever works best for you. I started out with only a pocket knife and a toothpick but my dear Husband bought me some carving tools for Christmas, so I have graduated to using those now. I’m a firm believer in using whatever you can find that will give you the effect that you’re looking for though and have used some pretty unconventional items in my creations.

Pinch off enough clay to form the size of Sand Dollar you’re thinking of and form that into a small ball. Create one more small ball  and flatten both out until they are pretty close to the same size. Don’t worry about the edges at this point. No need for a perfect circle here.

Now with whatever you chose for a tool, I am using a clay stylus here, create the little star flower shape on the top of one of the circles. Usually there are five petals and smaller petals inside those, but this is your Sand Dollar so be creative here if you’d like. I created little dots in the center of mine with the stylus.

carve the 5 petal design into the the clay but not all the way through, just enough to indent it

Now take the Sand Dollar you just marked and dome the underside a little. You can do this with just your finger. Just a small dome though as Sand Dollars are not flat and not extremely puffy either.

Use either your finger tip or a ball stylus to gently dome the clay you just carved

Attach the other flattened circle to the bottom of the domed piece and carefully pinch the seams together until the seams disappear. 

pinch the seams gently until they disappear, your dome will flatten a bitcut out the holes through both layers carefully trying not to disturb the imprints

Very carefully, with a razor blade or sharp pick, cutout the holes through both layers. A little tricky to do without messing up the top but just be gentle with it and you’ll have a gorgeous Sand Dollar. At this point, you could add anything you’d like to the top, like stones or crystals. Make an indention as big as the stone and glue the stone in after the baking process or leave the stone in place and anchor it with more clay. Either way works, but I find that taking the stone out and glueing it back into place shows more of the gem and it’s my preference.

I’m not sure how most people go

Add paint,glitter or indentations for stones. Whatever you want at this point, it is Your Sand Dollar and should reflect your own personal style

about this next phase but personally I like to paint my pieces before I bake them. At this stage  you can add some glitter,paint or more texture. I added some pearl paint, a little copper glitter and a slight dusting of peach powder to this one. When you’re happy with the outcome, pop it in the oven on 275 degrees(if you are using sculpey clay, check the type of clay for the instructions on baking what you are using as all are a little different) for about 35 minutes. 

I will typically add more details to mine after it’s taken out of the oven until I get the desired effect and then cook it again. I like to seal my pieces with a clay sealant before I add any embellishments like gems, or stones.  Let your piece dry and set before adding it to any jewelry components. I am so impatient, I had to learn this the hard way!

I’d love to see your  finished Sand Dollars. I’m hoping to do many more this year and I promise I’ll get better at them. Maybe I will learn to do a video as well in the near future. I hope you enjoyed this tutorial and have fun making your own Sand Dollar. I’ll post my finished necklace as soon as it’s finished so you can see how I used my sand dollar in Jewelry.

Polymer clay Lion Necklace finished


Here is the Lion attached to a Russian Goldplate plaque and set into a necklace. The soft green jade beads and added touch of the flowers added a more feminie touch to this piece. I get most of my supplies from BSueBoutiques and she has some really awesome findings there and her Etsy store too. Great prices and truly good quality stuff.

I will be adding a new section to my Etsy shop soon to include my polymer clay works.  Trying to get an inventory of great pieces to include in that section  will take some time so keep checking for updates on that venture.

Majestic
Majestic closeup

This year I plan on making some tutorials so you can follow and learn this craft with me as I explore the wonders of polymer clay. I have a few ideas already rolling around my head.


Polymer clay Lion Completion


Happy New Year!! I have a feeling this will be a great year for me since I love what I’m doing and have a clear direction and goal for myself. I’m loving how this Lion is coming along although I should’ve taken a few more shots for you before I moved on. It’s hard to stop the process and take pictures but I’ll get better at that on the next one.

Ok, so yesterday I made the head and added some highlights and then baked it, which means the mane is next. I tried to carve the mane out of a lump but didn’t like the look that way. Instead, I chose to use little ropes of clay and attached them to the back of the head.

Polymer clay Lion

I took out some acrylic paint and dabbed it all over the mane before adding a sprinkle of glitter in a copper color.  Actually, I added the eyes (which are black rhinestones) a little too soon in the process and would suggest waiting until you are happy with the rest before adding them.

Now back into the oven to bake a bit more. 275 degrees for about 15 min this time, just to set the paint and the tendrils in place.
 
He’s looking pretty good so far but I think it needs some more tendrils between the ears and a little more blending on his face.

Finished Polymer clay Lion

Now, that looks much better. I did end up removing the eyes and replacing them with new stones because I noticed some glitter on them and didn’t care for it. Like I suggested, add the eyes last! This is still new to me and very much a learning process. I love the way it came out in the end and actually have learned alot by just creating and fiddling around with the clay until I got it looking just right.

 
I would tell anyone wanting to try this to just jump on in and don’t worry about any mistakes( happy accidents). Sometimes they work to your advantage. You can always just ball up the clay and start over if you aren’t happy with it.
 
Now it’s time to turn this piece into a beautiful art necklace. I’ll probably just get that done and share a finished photo with you sometime today.
 
I plan on making another clay creation soon and already have the idea drawn out. I’ll try to get a better step by step progression on the next one so maybe you can follow along and make one too if you’d like.

Polymer clay Lion in progress


I’m working on a polymer clay lion at the moment and I think it will become a great art necklace when finished. I’ve decided to take some snapshots along the way to share with you. I’ve been forming the head today and it’s ready for the oven.

sculpted lion head

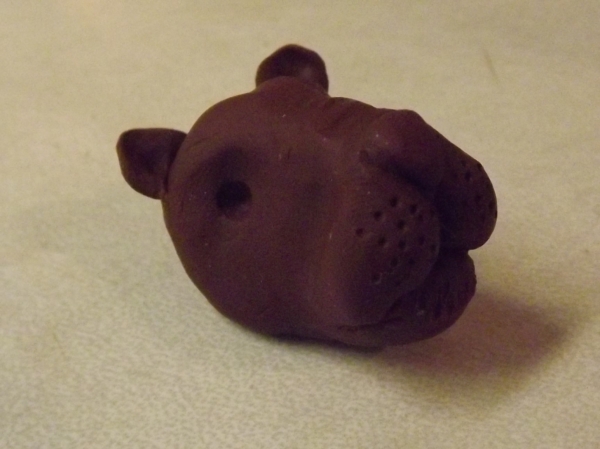
I started with a small ball of clay and formed it with my fingers and some carving tools until it looked about right.  Added some small cup ears and voila, we have a lion head.

 
In the oven for about 60 minutes on 275 degrees and now it’s ready for more sculpting. I think I’ll add some highlights now to get a better grip on the face texture so I know what needs to be done next.
 
HIghlighted lion head

Looking good so far. On to the mane…stay tuned for that in the next post.

Exploring Polymer clay and loving it!


Now that the Holidays are over, it’s time to get back to working on new Handmade creations and challenging myself to do more and more new stuff. Right now, I am exploring Polymer clay and loving it. The cold porcelain was great but had so many limitaions that I switched over to the polymer. Recently I made a dragon brooch for my dear sister.

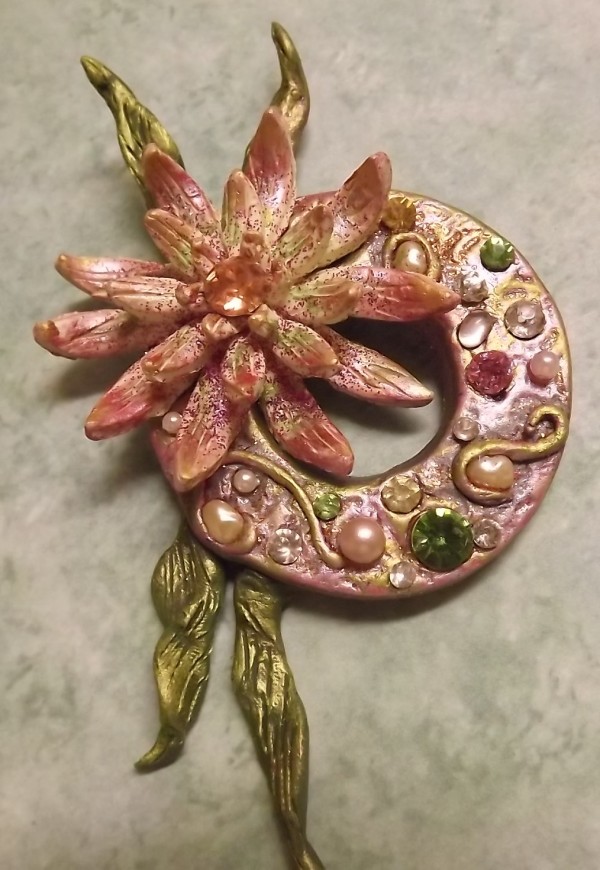
I had so much fun creating this one that I decided to make another brooch with embedded pearls and crystals to see how that would work out. I must say I really do love that look alot. I did find that I needed to reinforce some of the Polymer dragon broochleaves for strength and wish that I had done the same on this dragons hair as well. Live and learn I guess. That’s what it’s all about. Learning new techniques and gaining knowledge with each design.

Polymer clay brooch

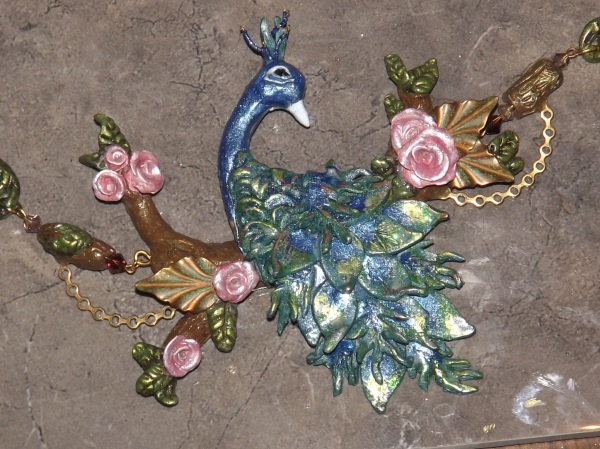
  I just love Peacocks and created this necklace over the Christmas holiday. Love the color and working with my hands. I had intended on adding some crystals to this piece but figured it was already over the top and didn’t truly need anything more.

I know there are molds out there for polymer clay but I love designing and creating without the use of molds. I believe it gives a much more handmade feel and uniqueness to my creations.

At the time I created these, I had no real tools to use. A toothpick and a pocket knife came in pretty handy though. My darling husband bought me some wonderful carving tools for Christmas and I can’t wait to use them. I think I will be able to get much more detail now and have tons more fun too!
 
My current design is a work in progress and I plan on photographing it as I go along. So far, I’ve gotten the head of this lion created and in the oven to bake. I’ll add the mane next and then see where the design goes from there. I have a plan for it but am not sure I can get it to work out as I expect it to.
 
Stay tuned for more updates and photos as I create one of a kind pieces to share with you. I’ll be adding new content to my website soon as well so be sure to stop by there too.  Have a wonderful Creative day!! 

Handmade Polymer clay peacock necklace


Cold Porcelain ornaments?


I’ve been having fun experimenting with Cold Porcelain clay. I’m a little rusty at making flowers but I think I’ll get better in time as it comes back to me. I like the way it feels and the transparency is great too. Perfect for painting or dusting. I used an enamel sealant on them and that seems to have worked out very well.

Cold Porcelain rose

Here you can see the difference after I painted one with some Pearl paint. Love the way it shimmers in the light. 

 Lots more practice and ideas will make this one of my favorite mediums I think. I can see great possibilities using this clay. I’ve designed a necklace for a challenge but am unsure whether I’ll enter it or not at this point. I may just finish it up and add it to my Etsy shop instead.What do you think?

Roses in the snow

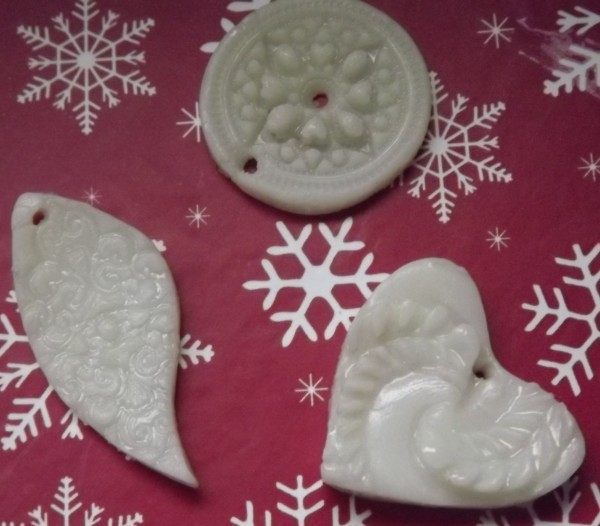
I made some other shapes and added some dimension with a couple of brass findings I had on hand and I think they look awesome. I can’t wait until they are dry so I can see what painting technique makes them pop.

Wouldn’t these make great ornaments for your tree this Christmas? I think so, a little glitter and some paint..hmm I like that idea. Maybe some silk ribbon to hang them from too. I’ll explore that more on another day soon.