Over the past week I’ve been challenging myself to handcraft a life-like floral arrangement out of polymer clay. It’s had its ups and downs so far but I’m making progress. This will be the most difficult piece I’ve attempted so far.
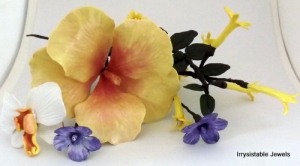 I have always had a love of flowers so I figured why not see if I can do this. I must say the greenery is a hard thing to recreate too but the Tulip is by far the hardest yet. You can follow my progress on facebook too as I post there as soon as I complete a flower. Here are a few I’ve finished so far.
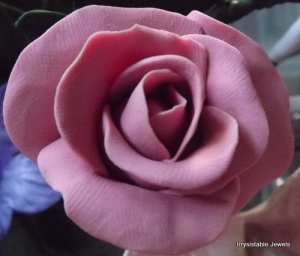

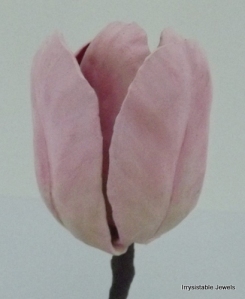 Leave me a comment and let me know what you think. I’d love to get your opinion and suggestions.
All posts tagged Sculpey
Life Size Polymer Clay Flowers
Posted by irrysistablejewels on June 13, 2012
https://irrysistablejewels.wordpress.com/2012/06/13/life-size-polymer-clay-flowers/
Polymer clay is so fun
I’ve finally finished my newest creation and this one was quite a challenge. I love how it turned out though. Flowers have always been a love of mine so it’s a natural marriage with clay. I’ll be writing an essay today to submit to a flowers contest along with a photo of an Orchid polymer clay necklace. I have no idea when I’ll hear from them in regards to this contest but I’m super excited. I only wish I could share the picture with you. Maybe you’ll be seeing it in Polymer cafe soon.  Check out my Facebook page for updates on the contest and other submissions I’ve been working on.
I need to spend some time on my website this afternoon and get it all updated. I’ve been so busy creating I haven’t paid much attention to it. I’ve also got some ideas for a couple of tutorials I need to get started on. I’m trying to get a handle on the video aspect for those so stay tuned for that. Have a wonderful day and thanks for stopping in to see my blog.
Posted by irrysistablejewels on February 1, 2012
https://irrysistablejewels.wordpress.com/2012/02/01/polymer-clay-is-so-fun/
How to make a polymer clay Sand Dollar
Hello and welcome to my little studio here at Irrysistable Jewels 🙂
I’m working on a new polymer clay necklace to add to my Etsy store and thought I’d take a breather and teach you how to make a Sand Dollar out of clay. It’s easy and anyone can do it! Nothing in nature is identical so only happy accidents can happen, therefore you can do this one without fear.
First you’ll need some polymer clay. I personally use sculpey but any clay would work. I’ll be exploring the different kinds of polymer in the near future. Make sure your clay is well conditioned and ready by working it in the palms of your hands until it is soft and malleable.
As far as tools go, you can use whatever works best for you. I started out with only a pocket knife and a toothpick but my dear Husband bought me some carving tools for Christmas, so I have graduated to using those now. I’m a firm believer in using whatever you can find that will give you the effect that you’re looking for though and have used some pretty unconventional items in my creations.
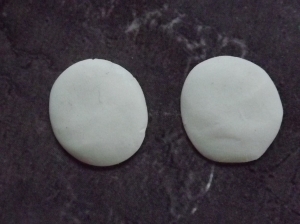
Pinch off enough clay to form the size of Sand Dollar you’re thinking of and form that into a small ball. Create one more small ball and flatten both out until they are pretty close to the same size. Don’t worry about the edges at this point. No need for a perfect circle here.
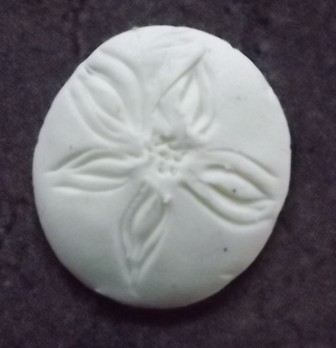
Now take the Sand Dollar you just marked and dome the underside a little. You can do this with just your finger. Just a small dome though as Sand Dollars are not flat and not extremely puffy either.
Attach the other flattened circle to the bottom of the domed piece and carefully pinch the seams together until the seams disappear.

pinch the seams gently until they disappear, your dome will flatten a bitcut out the holes through both layers carefully trying not to disturb the imprints
Very carefully, with a razor blade or sharp pick, cutout the holes through both layers. A little tricky to do without messing up the top but just be gentle with it and you’ll have a gorgeous Sand Dollar. At this point, you could add anything you’d like to the top, like stones or crystals. Make an indention as big as the stone and glue the stone in after the baking process or leave the stone in place and anchor it with more clay. Either way works, but I find that taking the stone out and glueing it back into place shows more of the gem and it’s my preference.
I’m not sure how most people go

Add paint,glitter or indentations for stones. Whatever you want at this point, it is Your Sand Dollar and should reflect your own personal style
about this next phase but personally I like to paint my pieces before I bake them. At this stage you can add some glitter,paint or more texture. I added some pearl paint, a little copper glitter and a slight dusting of peach powder to this one. When you’re happy with the outcome, pop it in the oven on 275 degrees(if you are using sculpey clay, check the type of clay for the instructions on baking what you are using as all are a little different) for about 35 minutes.
I will typically add more details to mine after it’s taken out of the oven until I get the desired effect and then cook it again. I like to seal my pieces with a clay sealant before I add any embellishments like gems, or stones. Let your piece dry and set before adding it to any jewelry components. I am so impatient, I had to learn this the hard way!
I’d love to see your finished Sand Dollars. I’m hoping to do many more this year and I promise I’ll get better at them. Maybe I will learn to do a video as well in the near future. I hope you enjoyed this tutorial and have fun making your own Sand Dollar. I’ll post my finished necklace as soon as it’s finished so you can see how I used my sand dollar in Jewelry.
Posted by irrysistablejewels on January 3, 2012
https://irrysistablejewels.wordpress.com/2012/01/03/how-to-make-a-polymer-clay-sand-dollar/
