Finally back to creating again!


I know it’s been a long time since I posted anything here but life got in the way. I am back now feeling very inspired and creative, ready to get my hands in some clay. In fact, I have created a couple things to show you. I’ve got so many ideas in my head I can’t wait to get started on them. Hopefully you’ll come along as I re-explore polymer clay. Here’s a sampling of my new works…

20140113-144916.jpg

20140113-145041.jpg

20140113-145134.jpg

20140113-145151.jpg

20140113-145201.jpg

Polymer clay Polar Bear


I’ve been working on this Polar Bear the last couple of days since the weather is so wet and cold outside here in Oregon. It seemed like the perfect subject to go along with the wintery mix. Although it’s not completed, I wanted to share my progress with you.

Messy Workshop Blog Hop


Wow, my space is even messier than I thought, and hey, there’s that wire I was looking for yesterday. I should take pictures of my table more often, might help me find lost items faster. What a great Blog Hop idea Brenda Sue of Bsue Boutiques had with this. I wonder who’s space will be the messiest? Should we have had a contest on that? My guess is the one with the largest amount of space would win it since there’s more room to spread stuff out and lose it in.  

 I know I always wish for  more space but then I look at this mess and realize it would just grow and soon I’d be featured on an episode of Hoarders  I tend to keep everything and nothing is where it should be most of the time. I actually have a spare room I could convert but that’s where my sewing stuff is at the moment. I guess I have too many hobbies and not enough rooms. Yup , that’s right folks Irrysistable Jewels is really created on just a small table in my living room.

I tried to win the lottery so I could have the space of my dreams but didn’t even get 1 number in that. I’ve seen some beautiful spaces, all decked out with pretties on the walls and beautiful stuff to look at everywhere for inspiration. I guess I am inspired by my lack of these things to create something beautiful instead and that works for me. I do have to remember to push the chairs in before I leave since my little dog got up there and ate some yellow clay the other day. Little stinker! So much for my making daffodils until I get the store for more yellow clay anyway.

I love sculpting Polymer clay and thankfully it doesn’t require too much room to do it. When the weather is nice I can take a TV tray and sculpt out on the deck in the sunshine. Feeds my creative side and feeds my body with Vitamin D to boot! See there, now I’m trying to claim the porch for my creating space, Ha, hubby better watch out or he’ll be out in the dog house soon. I’d love to move all his tools out of the shed and set up shop in there as well but I think he might protest that idea. He’s very good-natured but I could be crossing a line there for sure!

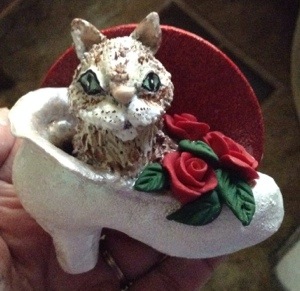
I’ve been selected to showcase my creations for RAW Artists in Portland Oregon on May 24th at the Bossanova Ballroom so my workspace is especially messy at the moment in preparation for that event. I’m extremely excited about it and nervous at the same time. Tons of work to get finished for that so it’s keeping me away from creating for now. Hopefully, I’ll be able to complete the Booth part of it and get back into sculpting in a few more days. I’ve got a few ideas for new creations rattling around my head that are just dying to be created. Here’s a few pieces that will make it into the show.

I know I’ve said that I plan on developing some tutorials for you and I DO intend on completing those when I get back. Looking forward to getting some of those done as well. I’ll be listing some new items in my Etsy shop when I return too so keep an eye out for those. It’s been a very busy couple months for me but I expect things to slow down enough soon for me to accomplish all of my ideas.

Last month I entered the Polymer Clay Central challenge and won 2nd place with my Bird in the nest piece. I am entered in the PCAGOE Monthly challenge this month too. I’ll post the link for that challenge when it’s up and running. Should be in the next couple days.  Visit my Facebook page for more information on Challenges as well.  

You can follow my blog for pics of the show in May and the tutorials coming soon. I also have a website  http://www.IrrysistableJewels.com

I should really think about cleaning this up a bit now. Hmmm, nope, I’m going blog hopping instead! See ya there! Tamara

MESSY WORKSHOP BLOG PARTICIPANTS

Brenda Sue Lansdowne

http://www.bsueboutiques.typepad.com/

Robin Delargy:

http://looloosbox.blogspot.com/

Kim at Cianci Blue

http://cianciblue.blogspot.com/

Jennifer Jazwick-Smith

http://hudathoughts-jennifer.blogspot.com/

Mary Shannon Hicks

http://www.uptwnsh-fallingintothesky.blogspot.com/

Tracy Swartz

http://tracyswartz.com/category/blog

Jacqueline Marchant

http://jaacquelinesjewels.blogspot.com/

Lynnea Perry Bennett

http://designsbylynnea.blogspot.com/

Terry Matusyk

http://pinkchapeau.wordpress.com/

Laurel Steven

http://laurelsteven.blogspot.com/

Dr. Brassy Steamington

http://drbrassysteampunk.blogspot.com/

Pamela Takeshige

http://www.crittersandthings.blogspot.com/

Kris Lanae Binsfeld

http://www.cherishdesigns.wordpress.com/

Outre Art

http://theartistspaintbox.wordpress.com/

Linzi Alford

http://www.magpieintheskyspoilheaptales.blogspot.com/

Deb Davis

http://naturaltreasuresbydeb.blogspot.com/

Tamara Jones

https://irrysistablejewels.wordpress.com/   <—–YOU ARE HERE

Harry Wood

http://www.oscarcrow.blogspot.com

Gerry Nickerson

http://gersgems1.blogspot.com/

Elizabeth Owens-Dwy

http://www.thepolymergeek.blogspot.com/

Georgene Lockwood

http://sylvanavintagedesigns.wordpress.com/

Charisa Sloper

http://www.blog.obsidiansoda.com/

Jennifer Justman

http://soulsfiredesigns.blogspot.com/

Beanzie

http://the-vintage-heart.blogspot.com/

Mary Deis

http://mdeis.blogspot.com/

Cheri Reed

http://creativedesignsbycheri.blogspot.com/

Sondra Kolner

http://scrappybydesign.weebly.com/index.html

Sonya Ingersoll-Stille

http://www.dreaminofbeads.blogspot.com/

Lori Anderson

http://www.prettythingsblog.com/

Sandra McGriff

http://skyescreativechaos.blogspot.ca/

Shelly Joyce

http://www.aujourlejour-shelly.blogspot.com/

Joan Williams

http://www.lilrubyjewelry.wordpress.com/

Kashmira Patel

http://sadafulee.blogspot.com/

Deb Beechy

http://beetique56.blogspot.com/

Ginger Bishop

http://lilmummylikes.blogspot.com/

Kelli Jacobson

http://creativemoonjewelryandthings.com/

Natalie McKenna

http://www.grubbi.co.uk/

Andrew Thornton

http://andrew-thornton.blogspot.com/

Mary Govaars

http://mlhjewelrydesigns.com/

Kate Mulligan

http://mulliganstewjewelry.blogspot.com/

Lisa Lodge

http://pineridgetreasures.blogspot.com/

Tami Luchini

http://ssprocketsmetal.blogspot.com/

Monique Lula

http://www.moniquelula.com/blog/

Lee Koopman

http://stregajewellry.wordpress.com/

Jayne Capps

http://mamasgottodoodle.blogspot.com/

Susan Lloyd

http://designsbysusan-dbs.blogspot.com/

Cynthia Wainscott

http://www.exoticperujewelry.blogspot.com/

Stephanie Amanti

http://www.stephaniesjewelrybox.blogspot.com/

Alicia Marinache

http://www.allprettythings.ca/

Sam Hamp

http://hampgirl59.blogspot.com/

Lennis Carrier

http://www.windbent.net/

Polymer Clay Seahorse


I can finally reveal the Necklace I made using those little sand dollars I showed you how to make. This Sea Horse was really fun to make and I’m pretty happy with the result. I’ve been going through some medical issues and it’s kept me from my blog a little longer than expected but I’m back now and will be adding some new content in the next day or so. Find all my new creations at my Etsy shop and on my Facebook page.   

Polymer clay is so fun


I’ve finally finished my newest creation and this one was quite a challenge. I love how it turned out though. Flowers have always been a love of mine so it’s a natural marriage with clay. I’ll be writing an essay today to submit to a flowers contest  along with a photo of an Orchid polymer clay necklace. I have no idea when I’ll hear from them in regards to this contest but I’m super excited. I only wish I could share the picture with you. Maybe you’ll be seeing it in Polymer cafe soon.  Check out my Facebook page  for updates on the contest and other submissions I’ve been working on.


I need to spend some time on my website this afternoon and get it all updated.  I’ve been so busy creating I haven’t paid much attention to it. I’ve also got some ideas for a couple of tutorials I need to get started on. I’m trying to get a handle on the video aspect for those so stay tuned for that. Have a wonderful day and thanks for stopping in to see my blog.

Polymer Clay Flowers/Star Gazer Lily


I’ve been very busy creating some polymer clay flowers the last few days. Taking my cake decorating skills and transposing them into clay has been an experiment to say the least but it does work with a little tweaking. I made this Star Gazer lily a couple days ago and applied some watercolor paint to it. I love the soft effect I achieved.  Today I made a smaller version and painted it with powders so I could compare the two and decide which one worked best for florals. I must say I think I like the watercolor effect best but they both look good. Currently I am working on another necklace for a magazine submission using the Star Gazer as the focal.

 I’m thinking about posting a tutorial on this Lily in the near future so if you’re interested in that  please leave me a comment at the end of this blog.

My Granddaughter’s birthday is approaching soon, so rather than buying her something, I created a special little sculpture for her. Sure had fun with this one and I’m sure she’ll love it.  I can see some Christmas Ornaments coming at some point. Those should be really fun to create. Little kids love to see their names on things and my Grandkids are no different. I love making things for them!

Here’s another floral necklace I created a few days ago. I would do this one a little different next time though. I should’ve surrounded the petals with some baking soda to keep them from drooping. Live and learn I suppose.  I’ll be listing this one in my Etsy shop in a day or so. Still have a few things to finish on it first.

I love working with polymer clay! It’s the best stress reliever around if you ask me.


How to Create a Polymer Clay Sea Dragon


Ok, so last week I showed you how to make a polymer clay sand dollar. Would you like to learn something to go with it now?  I had intended on showing you how I used the Sand Dollar but I have submitted that necklace to a magazine for inclusion and am unable to reveal it until I get a yes or no from them. Keep your fingers crossed for me. I will get something published before the year is over, that’s my New Year’s resolution.  I’ve been very sick the last ten days so I haven’t felt up to creating or working on my website or Etsy shop. finally feeling better and ready to show you something else to try.

OK, back  to the lesson now, I have designed a Sea Dragon for you today. I made a beautiful Seahorse to share but that one is on the necklace mentioned above. I promise I’ll share it when I can but until then we can make this little guy. There’s no right or wrong way to do this so put your fear aside and just have fun with it.

First you’ll need some conditioned clay. Here I am using a bright yellow (shows up well for the camera) but you can choose any color you’d like.  I then flattened it with my pasta machine on the highest setting but a rolling-pin works too, just takes a bit longer. I bought this great texture mat from a wonderful little shop called BSueBoutiques and figured this was a great time to use it. Anything that will give you some texture will work though. Lace, brass stampings,just about anything will do. Look around your house and you’ll be surprised what you can find that will make a pattern in your clay.  

     There are a few handy tools I use, but mostly I use my hands. A razor blade is something you will need to cut out the shape or a very sharp knife. I started out with a toothpick and a pocket knife for tools so use whatever you can find and remember there are no right or wrongs here.  

Now let’s cut out the basic shape of our little  Sea Dragon. Yours does not have to be exactly like mine, in fact, it’s better if it isn’t since this is your Creation and it should reflect you. Just play around with the clay until you find a shape that works for you. That’s the best part of working with clay, you can just ball it up and start over if you don’t like it. Here’s the shape I ended up with. Feel free to print this out and use it as a template if you’d like. Lightly roll the edges with your fingertip to smooth out the blunt cut a bit. Now comes the fun part, Let’s decorate this little beast. I formed a mane using small balls of clay rolled into a cylinder shape and pressed onto the head. Make your Sea Dragon with as big or small a mane as you please, or maybe not at all if that’s what you like. 

Try not to make these too thin at the tips or they will not be strong enough after baking. I start out with a long pretty thick layer of tendrils on the bottom and keep adding tendrils varying in size from large, medium and finally small in the direction of the face. This adds lots of dimension and a little drama to the creature. When you are satisfied with the way the mane looks why not go for a little on its tail as well like I did here.

I like the way he’s taking shape now. Now comes the really fun part. Let’s embellish him with pearls, crystals, beads or whatever you’d like (but remember he needs to be baked so keep that in mind when you add things). Here I’ve added some pearls and a few small crystals. When adding beads and such that will be baked into your creation you’ll need to adhere them with a little extra clay. I simply wound a couple of pieces of clay like the tendrils we made around the bead and then smoothed it down with my fingertip a little. You could also just make an impression with the stone or bead and glue it in after it’s baked if you so choose.


I plan on adding some chain or beads when I’m finished so I created three holes for that in the tail. Better to add your holes before baking I think. You can see I used some tendrils on the body in a curly fashion but I didn’t like the look and have removed them from mine. Needs a little more bling don’t ya think?

Now that’s better! I also did a little fixing on the face too. I used a red crystal for the eye and built the area up with a small amount of clay. Just make some very small tendrils and adhere them above the crystal or bead and smooth it down a little. I did the same for the nostril too only a smaller crystal was inserted. I hand formed a small fin and attached that into the middle of the back toward the edge. I think mine is done.  How bout you?

 I always paint mine before putting it in the oven but you can certainly wait and paint it after baking if you’d prefer.

I think I’d like my Sea Dragon to have some splashes of orange and red on him. Choose whatever colors you think would enhance your Sea Dragon and give him a little sparkle. I love adding fine glitter to my creations too! This yellow was just a little too bright for my liking so I went over the body and face with a touch of Viva pearl precious metal colour. I then added some orange and a little red acrylic  paint to the mane before putting him in the oven on 275 degrees for about 35 minutes. Here’s my finished Sea dragon.

Would you like to see more lessons? Leave me a comment and an idea about what you’d like to create and I’ll do my best. We can learn together. Sounds like fun to me. Can’t wait to see what ideas you suggest. 🙂

How to make a polymer clay Sand Dollar


Hello and welcome to my little studio here at Irrysistable Jewels 🙂

I’m working on a new polymer clay necklace to add to my Etsy store and thought I’d take a breather and teach you how to make a Sand Dollar out of clay. It’s easy and anyone can do it! Nothing in nature is identical so only happy accidents can happen, therefore you can do this one without fear.

First you’ll need some polymer clay. I personally use sculpey but any clay would work. I’ll be exploring the different kinds of polymer in the near future. Make sure your clay is well conditioned and ready by working it in the palms of your hands until it is soft and malleable.

As far as tools go, you can use whatever works best for you. I started out with only a pocket knife and a toothpick but my dear Husband bought me some carving tools for Christmas, so I have graduated to using those now. I’m a firm believer in using whatever you can find that will give you the effect that you’re looking for though and have used some pretty unconventional items in my creations.

Pinch off enough clay to form the size of Sand Dollar you’re thinking of and form that into a small ball. Create one more small ball  and flatten both out until they are pretty close to the same size. Don’t worry about the edges at this point. No need for a perfect circle here.

Now with whatever you chose for a tool, I am using a clay stylus here, create the little star flower shape on the top of one of the circles. Usually there are five petals and smaller petals inside those, but this is your Sand Dollar so be creative here if you’d like. I created little dots in the center of mine with the stylus.

carve the 5 petal design into the the clay but not all the way through, just enough to indent it

Now take the Sand Dollar you just marked and dome the underside a little. You can do this with just your finger. Just a small dome though as Sand Dollars are not flat and not extremely puffy either.

Use either your finger tip or a ball stylus to gently dome the clay you just carved

Attach the other flattened circle to the bottom of the domed piece and carefully pinch the seams together until the seams disappear. 

pinch the seams gently until they disappear, your dome will flatten a bitcut out the holes through both layers carefully trying not to disturb the imprints

Very carefully, with a razor blade or sharp pick, cutout the holes through both layers. A little tricky to do without messing up the top but just be gentle with it and you’ll have a gorgeous Sand Dollar. At this point, you could add anything you’d like to the top, like stones or crystals. Make an indention as big as the stone and glue the stone in after the baking process or leave the stone in place and anchor it with more clay. Either way works, but I find that taking the stone out and glueing it back into place shows more of the gem and it’s my preference.

I’m not sure how most people go

Add paint,glitter or indentations for stones. Whatever you want at this point, it is Your Sand Dollar and should reflect your own personal style

about this next phase but personally I like to paint my pieces before I bake them. At this stage  you can add some glitter,paint or more texture. I added some pearl paint, a little copper glitter and a slight dusting of peach powder to this one. When you’re happy with the outcome, pop it in the oven on 275 degrees(if you are using sculpey clay, check the type of clay for the instructions on baking what you are using as all are a little different) for about 35 minutes. 

I will typically add more details to mine after it’s taken out of the oven until I get the desired effect and then cook it again. I like to seal my pieces with a clay sealant before I add any embellishments like gems, or stones.  Let your piece dry and set before adding it to any jewelry components. I am so impatient, I had to learn this the hard way!

I’d love to see your  finished Sand Dollars. I’m hoping to do many more this year and I promise I’ll get better at them. Maybe I will learn to do a video as well in the near future. I hope you enjoyed this tutorial and have fun making your own Sand Dollar. I’ll post my finished necklace as soon as it’s finished so you can see how I used my sand dollar in Jewelry.

Polymer clay Lion Necklace finished


Here is the Lion attached to a Russian Goldplate plaque and set into a necklace. The soft green jade beads and added touch of the flowers added a more feminie touch to this piece. I get most of my supplies from BSueBoutiques and she has some really awesome findings there and her Etsy store too. Great prices and truly good quality stuff.

I will be adding a new section to my Etsy shop soon to include my polymer clay works.  Trying to get an inventory of great pieces to include in that section  will take some time so keep checking for updates on that venture.

Majestic
Majestic closeup

This year I plan on making some tutorials so you can follow and learn this craft with me as I explore the wonders of polymer clay. I have a few ideas already rolling around my head.


Polymer clay Lion Completion


Happy New Year!! I have a feeling this will be a great year for me since I love what I’m doing and have a clear direction and goal for myself. I’m loving how this Lion is coming along although I should’ve taken a few more shots for you before I moved on. It’s hard to stop the process and take pictures but I’ll get better at that on the next one.

Ok, so yesterday I made the head and added some highlights and then baked it, which means the mane is next. I tried to carve the mane out of a lump but didn’t like the look that way. Instead, I chose to use little ropes of clay and attached them to the back of the head.

Polymer clay Lion

I took out some acrylic paint and dabbed it all over the mane before adding a sprinkle of glitter in a copper color.  Actually, I added the eyes (which are black rhinestones) a little too soon in the process and would suggest waiting until you are happy with the rest before adding them.

Now back into the oven to bake a bit more. 275 degrees for about 15 min this time, just to set the paint and the tendrils in place.
 
He’s looking pretty good so far but I think it needs some more tendrils between the ears and a little more blending on his face.

Finished Polymer clay Lion

Now, that looks much better. I did end up removing the eyes and replacing them with new stones because I noticed some glitter on them and didn’t care for it. Like I suggested, add the eyes last! This is still new to me and very much a learning process. I love the way it came out in the end and actually have learned alot by just creating and fiddling around with the clay until I got it looking just right.

 
I would tell anyone wanting to try this to just jump on in and don’t worry about any mistakes( happy accidents). Sometimes they work to your advantage. You can always just ball up the clay and start over if you aren’t happy with it.
 
Now it’s time to turn this piece into a beautiful art necklace. I’ll probably just get that done and share a finished photo with you sometime today.
 
I plan on making another clay creation soon and already have the idea drawn out. I’ll try to get a better step by step progression on the next one so maybe you can follow along and make one too if you’d like.

Polymer clay Lion in progress


I’m working on a polymer clay lion at the moment and I think it will become a great art necklace when finished. I’ve decided to take some snapshots along the way to share with you. I’ve been forming the head today and it’s ready for the oven.

sculpted lion head

I started with a small ball of clay and formed it with my fingers and some carving tools until it looked about right.  Added some small cup ears and voila, we have a lion head.

 
In the oven for about 60 minutes on 275 degrees and now it’s ready for more sculpting. I think I’ll add some highlights now to get a better grip on the face texture so I know what needs to be done next.
 
HIghlighted lion head

Looking good so far. On to the mane…stay tuned for that in the next post.

Exploring Polymer clay and loving it!


Now that the Holidays are over, it’s time to get back to working on new Handmade creations and challenging myself to do more and more new stuff. Right now, I am exploring Polymer clay and loving it. The cold porcelain was great but had so many limitaions that I switched over to the polymer. Recently I made a dragon brooch for my dear sister.

I had so much fun creating this one that I decided to make another brooch with embedded pearls and crystals to see how that would work out. I must say I really do love that look alot. I did find that I needed to reinforce some of the Polymer dragon broochleaves for strength and wish that I had done the same on this dragons hair as well. Live and learn I guess. That’s what it’s all about. Learning new techniques and gaining knowledge with each design.

Polymer clay brooch

  I just love Peacocks and created this necklace over the Christmas holiday. Love the color and working with my hands. I had intended on adding some crystals to this piece but figured it was already over the top and didn’t truly need anything more.

I know there are molds out there for polymer clay but I love designing and creating without the use of molds. I believe it gives a much more handmade feel and uniqueness to my creations.

At the time I created these, I had no real tools to use. A toothpick and a pocket knife came in pretty handy though. My darling husband bought me some wonderful carving tools for Christmas and I can’t wait to use them. I think I will be able to get much more detail now and have tons more fun too!
 
My current design is a work in progress and I plan on photographing it as I go along. So far, I’ve gotten the head of this lion created and in the oven to bake. I’ll add the mane next and then see where the design goes from there. I have a plan for it but am not sure I can get it to work out as I expect it to.
 
Stay tuned for more updates and photos as I create one of a kind pieces to share with you. I’ll be adding new content to my website soon as well so be sure to stop by there too.  Have a wonderful Creative day!! 

Handmade Polymer clay peacock necklace


Cold Porcelain ornaments?


I’ve been having fun experimenting with Cold Porcelain clay. I’m a little rusty at making flowers but I think I’ll get better in time as it comes back to me. I like the way it feels and the transparency is great too. Perfect for painting or dusting. I used an enamel sealant on them and that seems to have worked out very well.

Cold Porcelain rose

Here you can see the difference after I painted one with some Pearl paint. Love the way it shimmers in the light. 

 Lots more practice and ideas will make this one of my favorite mediums I think. I can see great possibilities using this clay. I’ve designed a necklace for a challenge but am unsure whether I’ll enter it or not at this point. I may just finish it up and add it to my Etsy shop instead.What do you think?

Roses in the snow

I made some other shapes and added some dimension with a couple of brass findings I had on hand and I think they look awesome. I can’t wait until they are dry so I can see what painting technique makes them pop.

Wouldn’t these make great ornaments for your tree this Christmas? I think so, a little glitter and some paint..hmm I like that idea. Maybe some silk ribbon to hang them from too. I’ll explore that more on another day soon.

making cold porcelain


Today I made my first batch of cold porcelain clay. It’s resting in a ziplock bag for 24 hours and I so want to play with it right now. I’ve been making Fondant and Gumpaste flowers for years so this should come easy to me (I hope).  It was sure easy to make. Check out this video. How to make Cold Porcelain Paste 

Tomorrow I’ll begin making some flowers and leaves and see how it works. If I succeed,I’ll put up some lessons on flower making so you can learn it too. I’m hoping to make some awesome flowers to use in my Jewelry design and sell in my store on Etsy. Stay tuned for more updates on this new adventure of mine.

Silk Ribbon in Jewelry making


Silk Ribbon and Roses Necklace

Today I took a very ugly heart filigree and turned it into something spectacular using some embossing powder in white opaque and then rubbing some viva inka gold in green yellow over the top. I love the way it turned out. Kind of antiqued it and totally changed the appearance. I then added some hand wired leaves and a large  green rhinestone flower to the top. Surrounding it are three small pink roses. I just love roses. You can find more photos at http://www.Etsy.com/IrrysistableJewels

heart filigree

The chain was a little bland so I added some Silk ribbon and knotted them with gold crimp beads. Very romantic and ultra feminine I think.


Finished heart filigree with roses

One of these days I’m going to make a video on how to make the wired leaves. They’re fun to make.  I just listed this piece in my Etsy shop today and now I am busy creating something else to make you drool.

Favorite things contest


Hop on over to this blog to find out the details of this cool contest. http://bsueboutiques.typepad.com/bsue_boutiques_jewelry_su/# Just look at the prize, it’s  Wow piece isn’t it!

Featuring B’Sue Boutiques..come on in and meet her. You’ll love her!


Ok, today I am going to tell you about a Wonderful Lady I have met recently. Her name is B’Sue and she runs B’Sueboutiques. I can honestly say that she is the nicest person I have had the pleasure of dealing with since I started my Jewelry designing venture. You just have to go check out all the informative videos she has on you tube. I have learned so much in a short amount of time and my creative juices are on overdrive now.

Her jewelry is outstanding too and she’s just an inspiration to me what can I say, I really, really like this woman. Not just becasue she is so helpful and nice but because she loves what she does and it really shows in her work, videos and the way she deals with people.

One of B'Sues beautiful pieces


I spent hours last night just watching her videos and  learning as much about my craft as I can. They’re fun and informative, so do yourself a favor and check them out and then head on over to her boutique and grab some terrific things at GREAT prices and start creating. 

A few days ago I joined her new Creativity group on Flickr too. You should come join.  B’Sue makes these all so much fun you just can’t stop wanting to learn more. I’m telling ya, she’s the bomb guys and I am so thankful to have found her and you will be too if you are a jewelry artist, especially if you are  just starting out.

A Gorgeous Necklace by B'Sue

My Awesome Discovery


I found some awesome new products to use in my jewelry design today and I can’t wait to try them.  Have you ever heard of Gilder’s paste? Well it’s fantastic stuff and fun to play around with. Looks like shoe polish. I can see all kinds of possibilities using this to create some one of a kind pieces for my shop

You can change the color of anything, now how cool is that? My head is exploding with ideas. I’ve been so busy lately getting my storefront up and running that I haven’t had much time to be creative. I’m ready to jump back into the designing side of the business now and couldn’t be happier.

My ideas tend to come just before I fall asleep so I keep a small notebook beside the bed to write them down before I forget them. My poor hubby has to deal with a flashlight flickering and the sound of the pen scratching out a picture of what’s popped into my brain while he’s trying to sleep. He’s been very supportive of my new-found destiny, so I don’t think he minds all that much. I’m so lucky!


Grand Opening on ETSY


Finally I can say my new shop is open for Business. Took me all day to get everything done and ready. Lots of headaches along the way but it looks good except for the banner that is. Oh yes, the banner! It is proving to be my new nemisis and I am determined to get it right.  Come and check out the new store at http://www.etsy.com/shop/IrrysistibleJewels but PLEASE ignore the banner for now. 

This is one of my favorite Creations. I had a really hard time figuring out exactly what to do with this bone. I knew I wanted it to be something very special and Unique but nothing was popping into my head about it until late one night as I was sleeping. Yup, that’s right, it came to me in a dream and luckily I happened to have everything I needed to creat this One of  a kind piece on hand already.

I love the way the dark Blue Crystals accentuate the face and it makes me think of the man in the moon. There’s something mysterious about it that intigues me. It’s going to be very hard to let this one go but onward to the next Design I suppose. I’m sure I will have many favorites as time goes by but this one will always remain close to my heart. Hope you’ll stop by the shop. Tamara 

Moon Pendant

Opening an Etsy shop


I’m so excited tonight! I’ve finally gotten everything together and am now ready to open my new shop on Etsy tomorrow. I’ve put everything into this, money,time and my soul. Hope it goes well so I can continue to Design and create one of a kind pieces. I so love designing Jewelry. It’s become part of me and I can’t see myself not doing it daily. My creative side is doing the happy dance right now.

The Crystal is really a very deep purple

I’ve been reading and watching tons of videos trying to learn all I can about this art.  I must say there’s a lot of information out there and my mind is absorbing it like a sponge. Can’t seem to get enough. Sometimes it feels like my head will explode with all the stuff I’ve been cramming it full of, but I love it!